Setting Up AWS FinOps Agent: A Step-by-Step Guide (Preview)
AWS FinOps Agent went into public preview in June 2026, an agentic AI service, built on Amazon Bedrock, that investigates cost anomalies, answers natural-language cost questions, and routes findings to Slack or Jira. It's free to use during preview (though the underlying AWS API calls it makes still bill at standard rates).
This guide walks through setting one up from scratch in the AWS console, based on hands-on testing in a sandbox environment.
Note: AWS FinOps Agent is in preview and subject to change. Agent creation currently happens in US East (N. Virginia), though the agent analyzes cost data across all commercial AWS Regions.
Prerequisites
Before you start the wizard, make sure you have:
An IAM identity with permissions to create the agent (and, if you're letting the wizard auto-create roles, permission to create IAM roles)
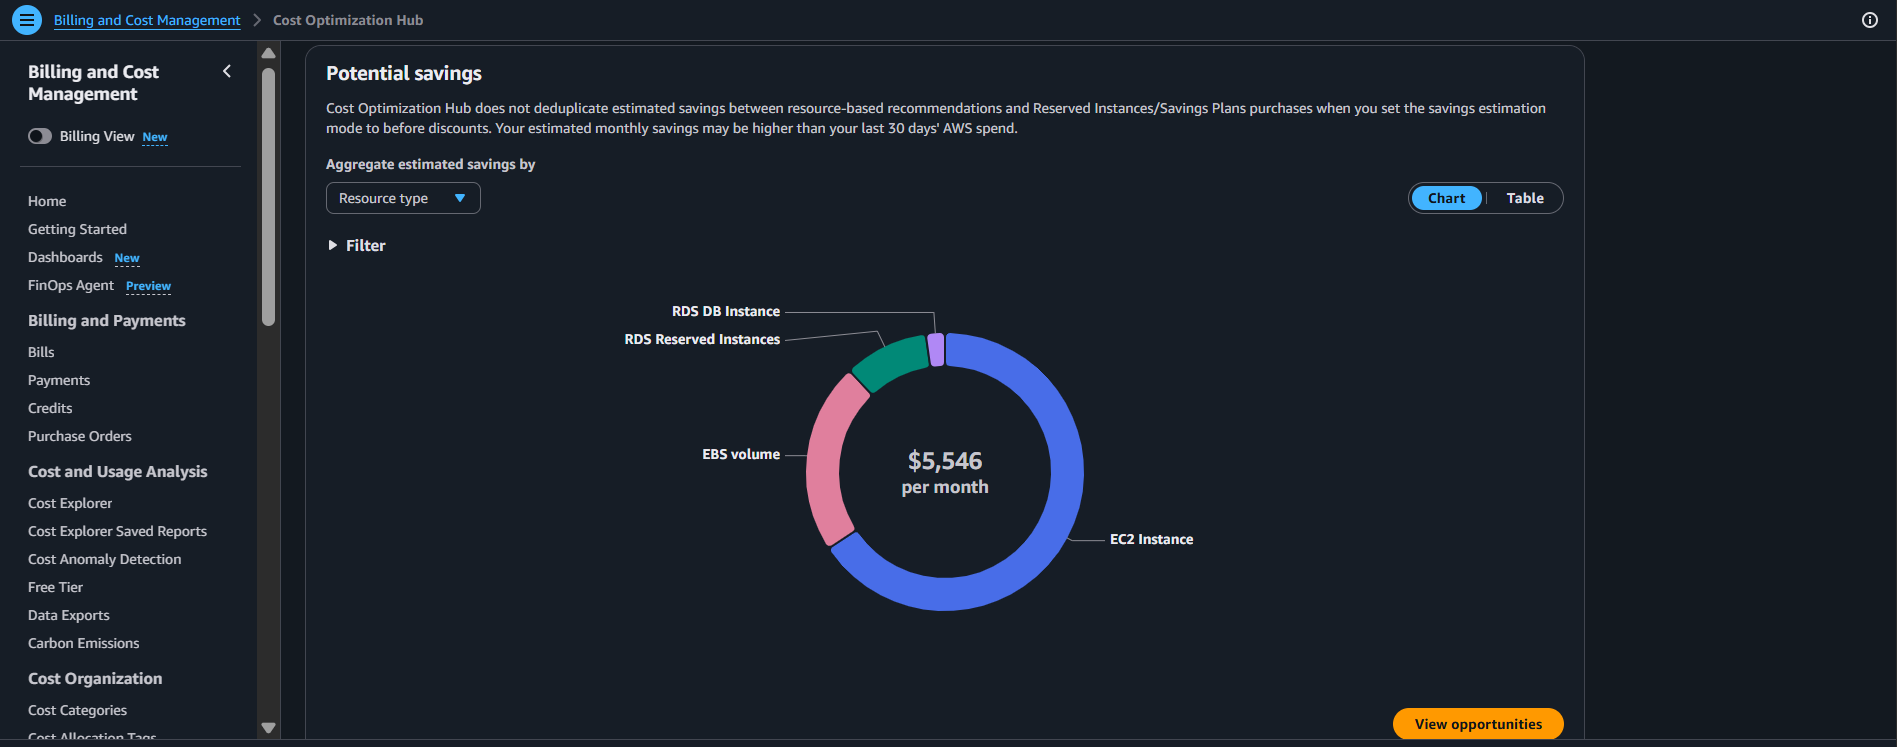
AWS Cost Optimization Hub turned on (
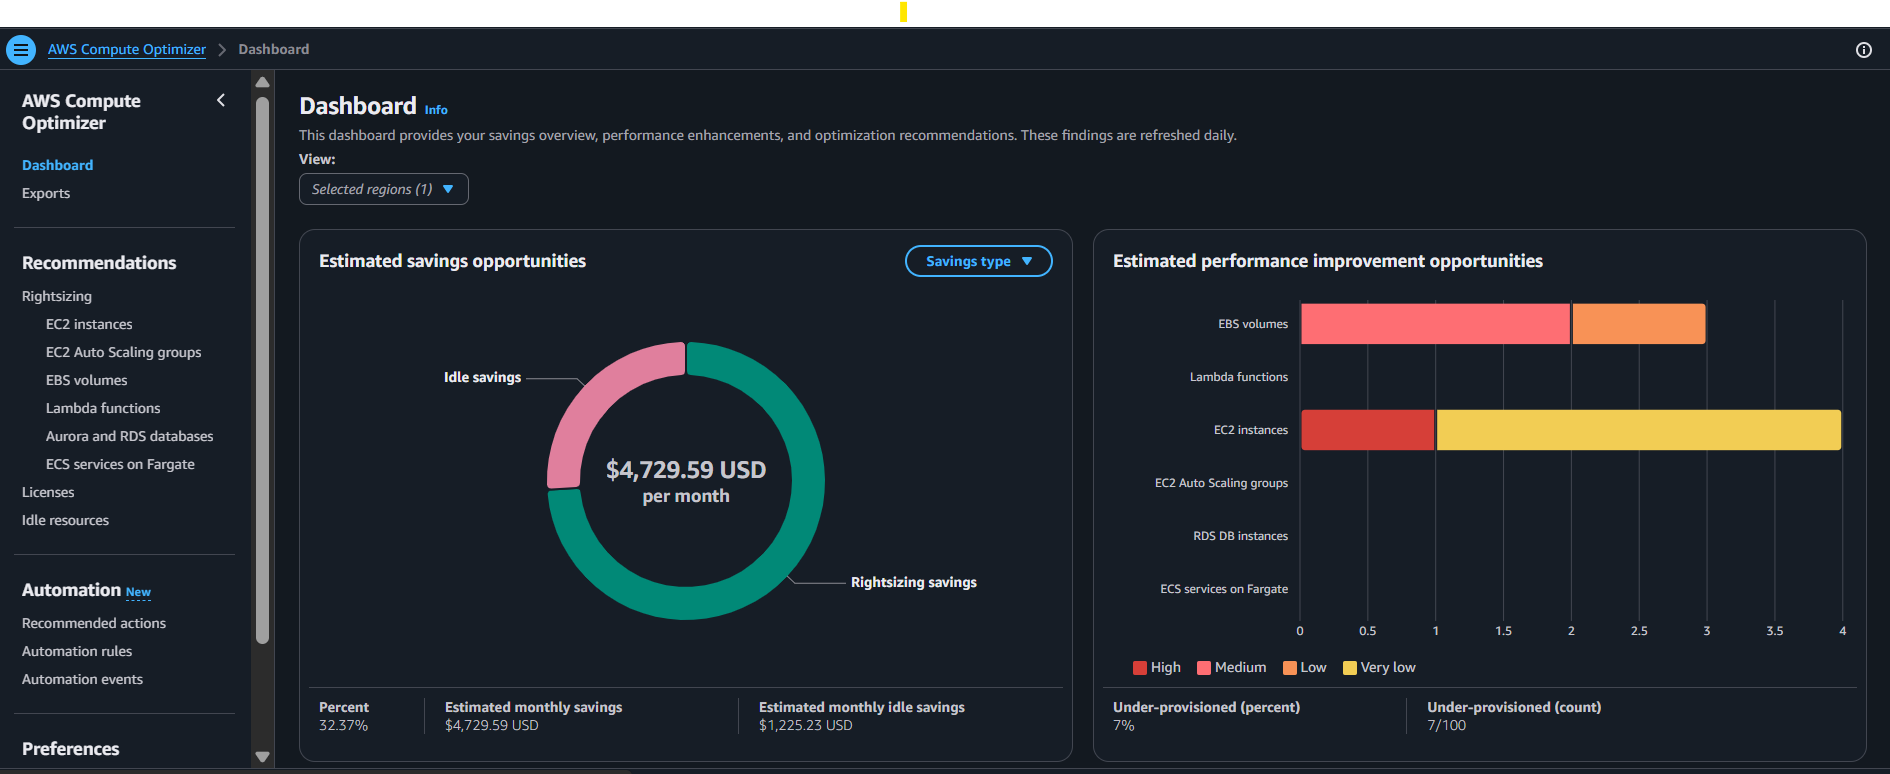
Console → Cost Management → Cost Optimization Hub) - this feeds the rightsizing, idle-resource, and Savings Plans recommendationsAWS Compute Optimizer turned on - same reason, it's what Cost Optimization Hub draws from
(Optional) A Jira Cloud site and/or Slack workspace ready, if you plan to wire up notifications
Both Cost Optimization Hub and Compute Optimizer are free to enable, and skipping them just means the agent's recommendations tab stays empty - it won't block agent creation.
📸 Cost Optimization Hub / Compute Optimizer enabled
Step 1: Open the AWS FinOps Agent console
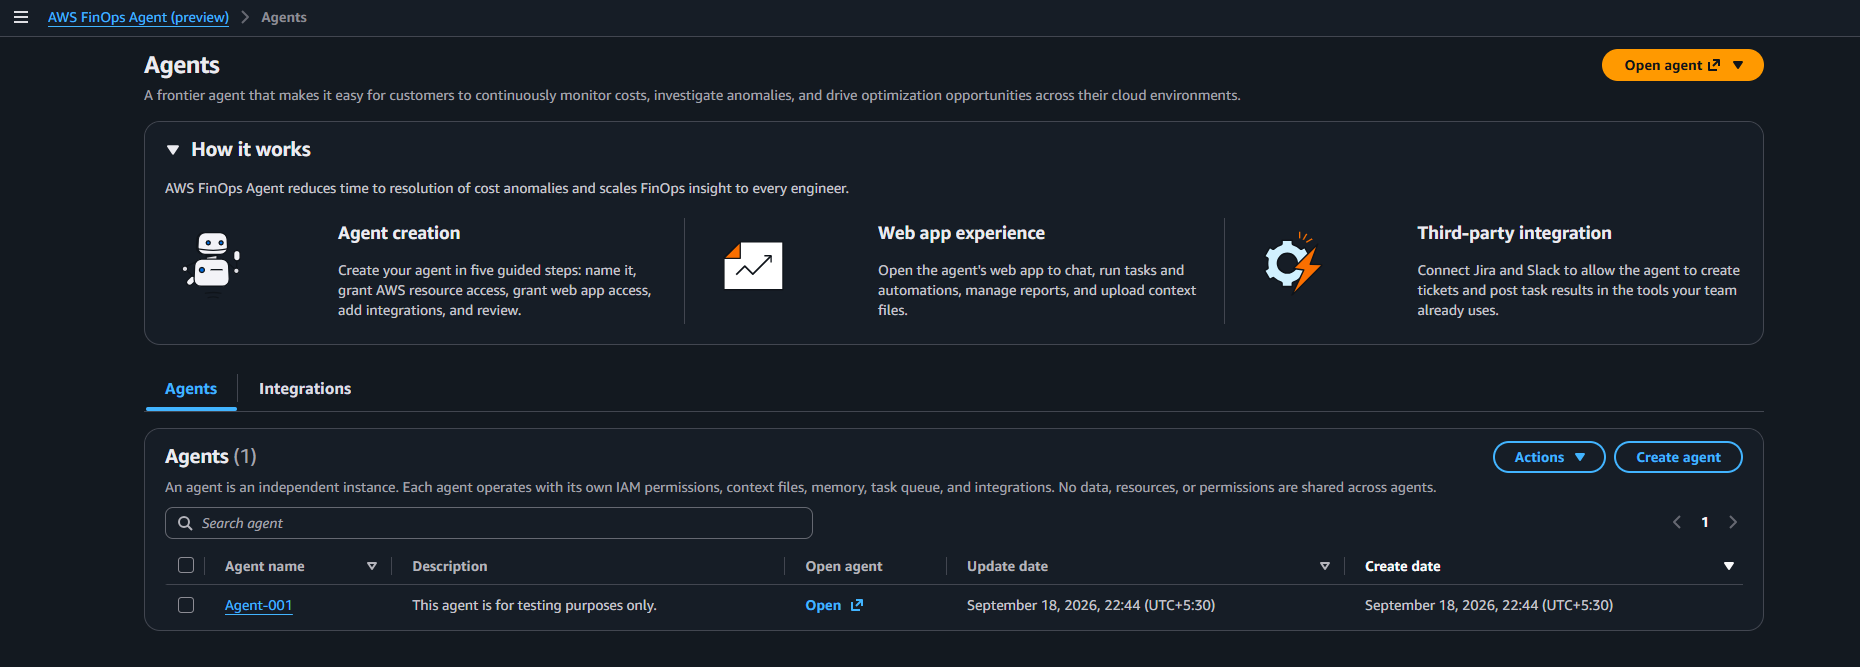
Head to the AWS FinOps Agent page in the console and go to the Agents tab. Click Create to launch the setup wizard — it's a five-step flow.
📸 Agents page → Create button
Step 2: Name your agent
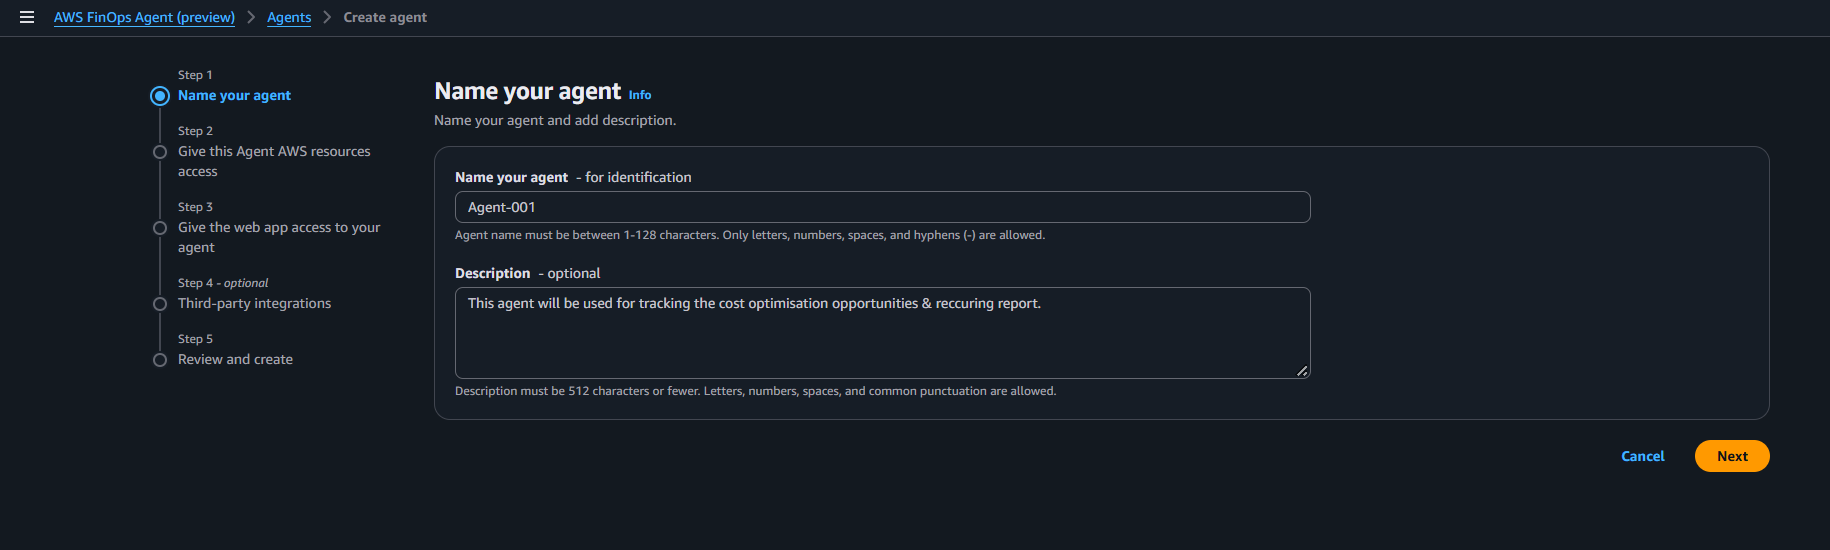
Give it a name (letters, numbers, spaces, and hyphens only, no underscores or special characters) and an optional description.
Worth knowing: every agent you create is fully independent separate IAM permissions, memory, context files, and integrations. If you're managing multiple AWS accounts or clients, that means one agent per environment rather than one shared instance.
📸 Name and description fields
Step 3: Set the agent's AWS resource access
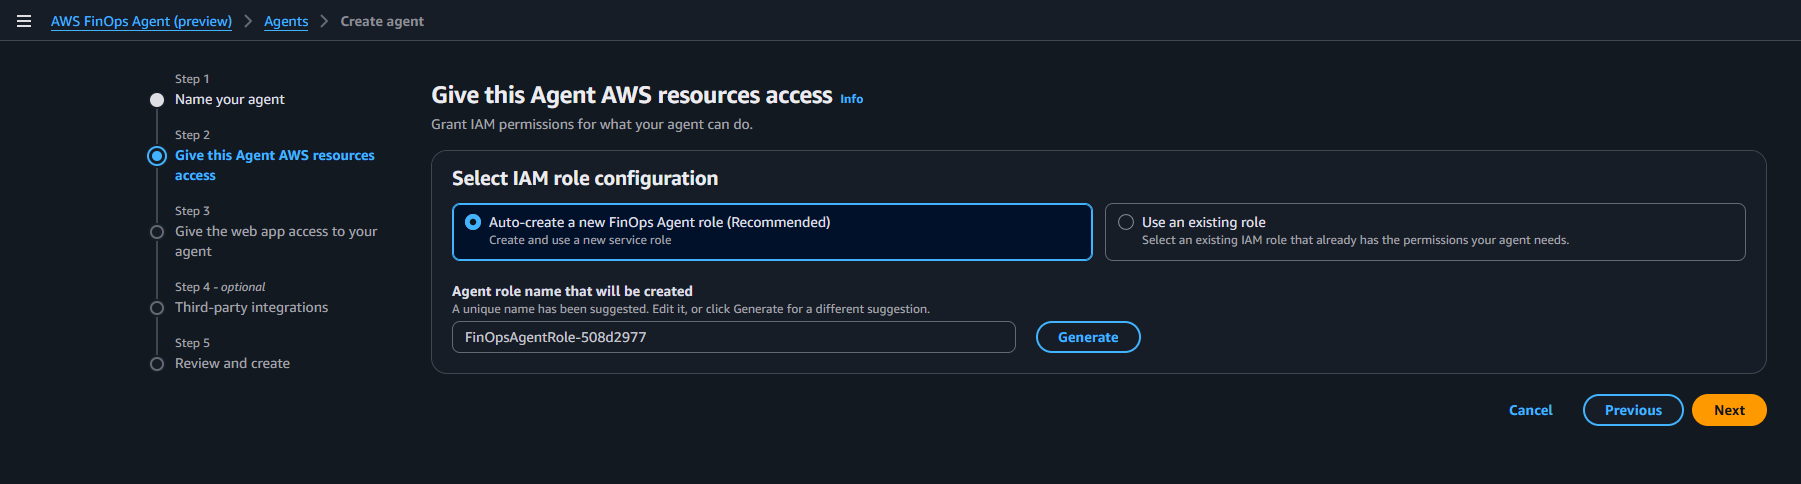
This is the IAM role the agent assumes to actually read your cost and operational data. You get two options:
Auto-create a new role (recommended) - the wizard provisions the role and attaches the right managed policy for you
Bring an existing role - useful if your org manages IAM centrally; the role needs the FinOps agent policy attached and a trust relationship with the FinOps Agent service
For a first setup, auto-create is the path of least resistance.
📸 IAM role selection step
Step 4: Set web app access
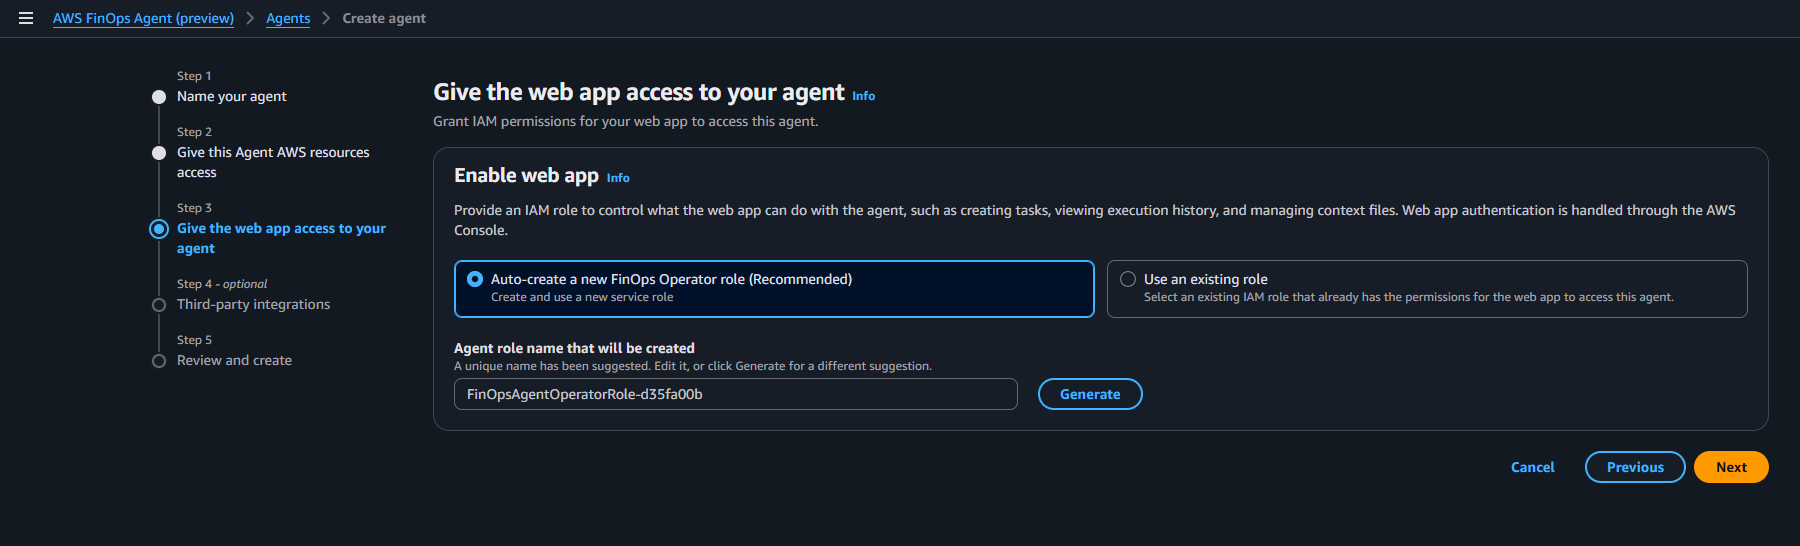
A second, separate role - this one controls what the web app itself can do: creating tasks, viewing run history, managing context files. Same choice as before (auto-create is recommended), and it's kept distinct from the data-access role above for least-privilege reasons.
📸 Operator role selection step
Step 5: Connect Jira and/or Slack (optional)
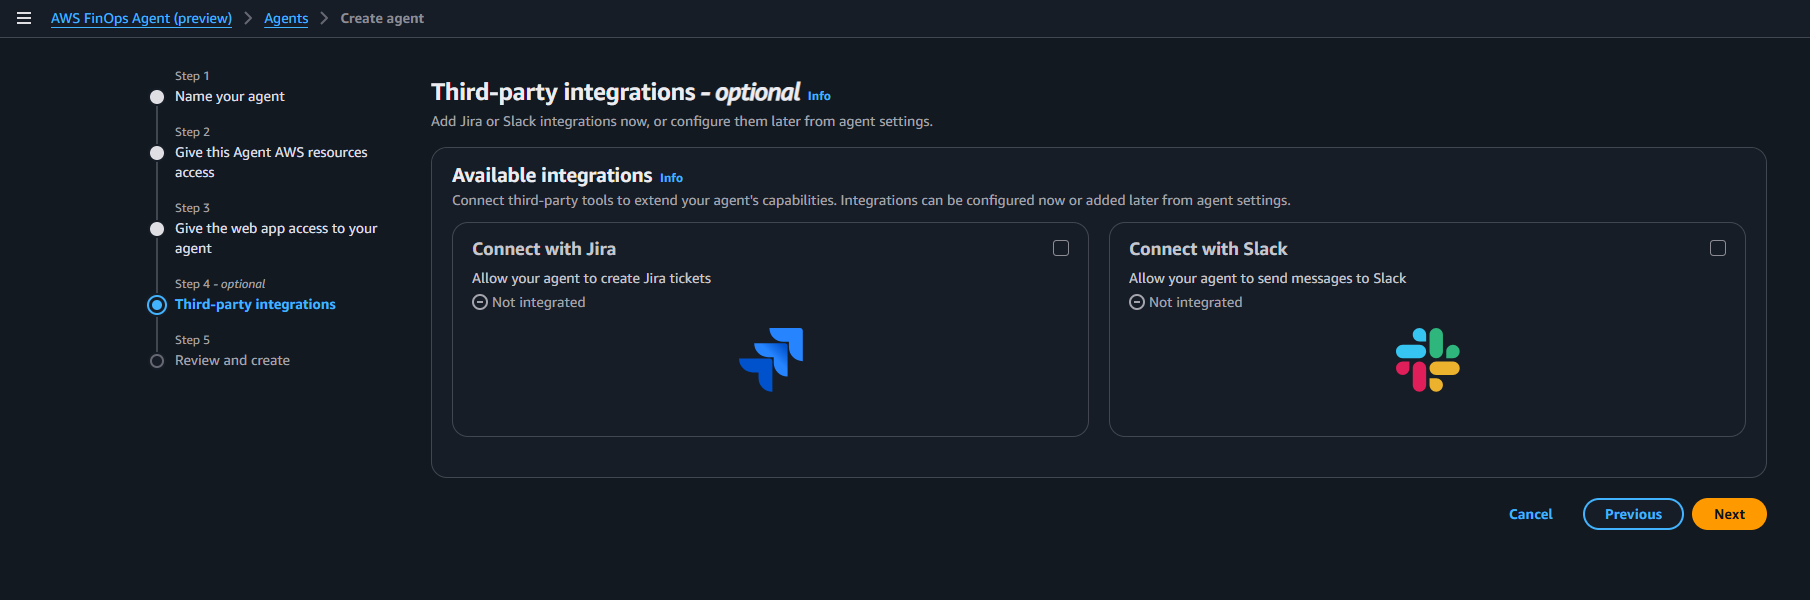
You can wire up either integration now or skip and add them later from the agent's detail page.
Slack: add the AWS FinOps Agent Slack app to your target channel first, then paste in the channel ID (right-click the channel → View channel details).
Jira: requires Jira Cloud (no on-prem support). The integration itself is authorized once at the account level; each agent then gets its own connection scoped to a specific project.
📸 Integrations step ( skipped in this test setup )
Step 6: Review and create
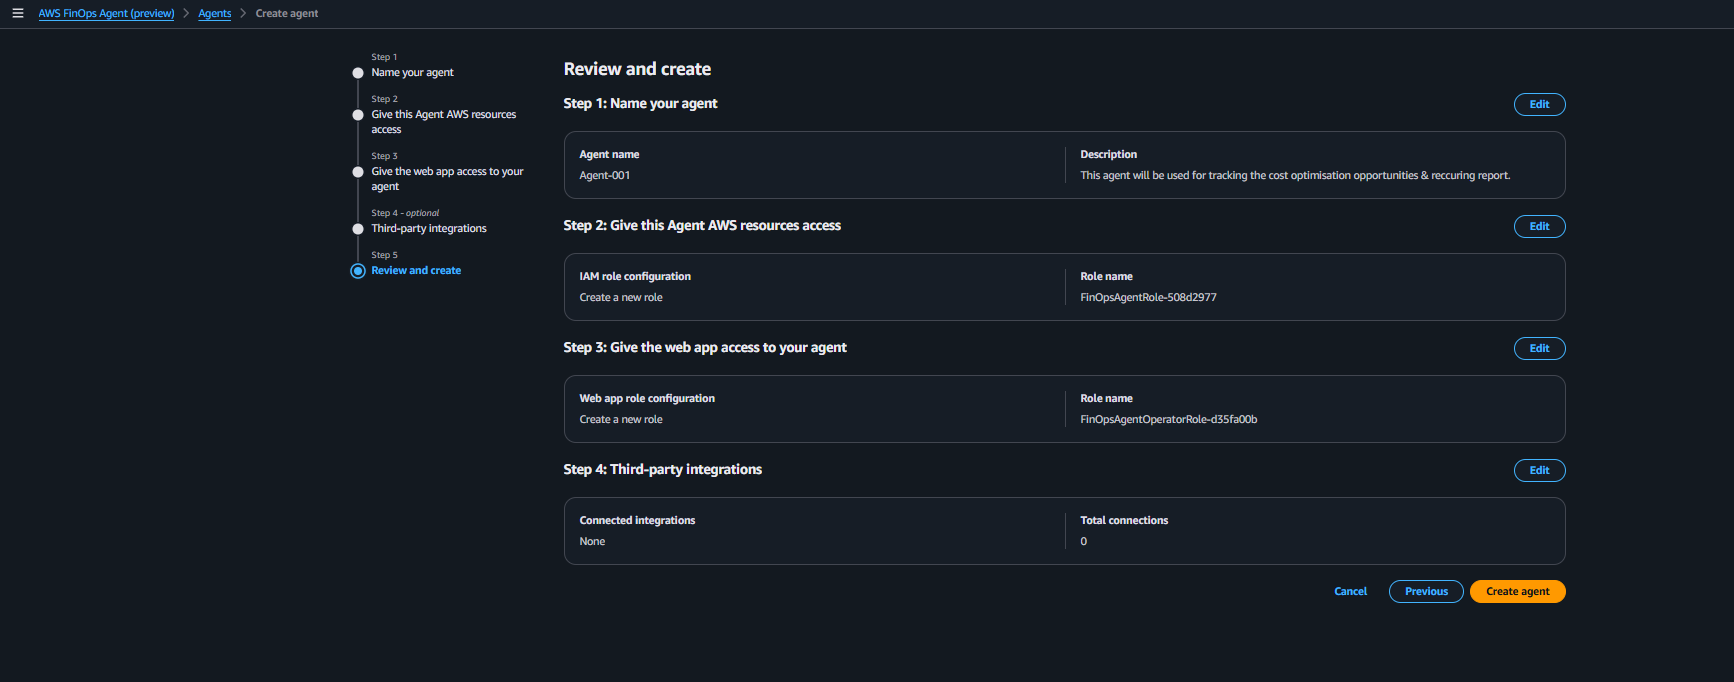
The final screen summarizes everything - name, resource access, web app access, integrations. Double-check it, hit Edit on anything that needs fixing, then click Create agent.
📸 Review screen
Step 7: Verify the setup
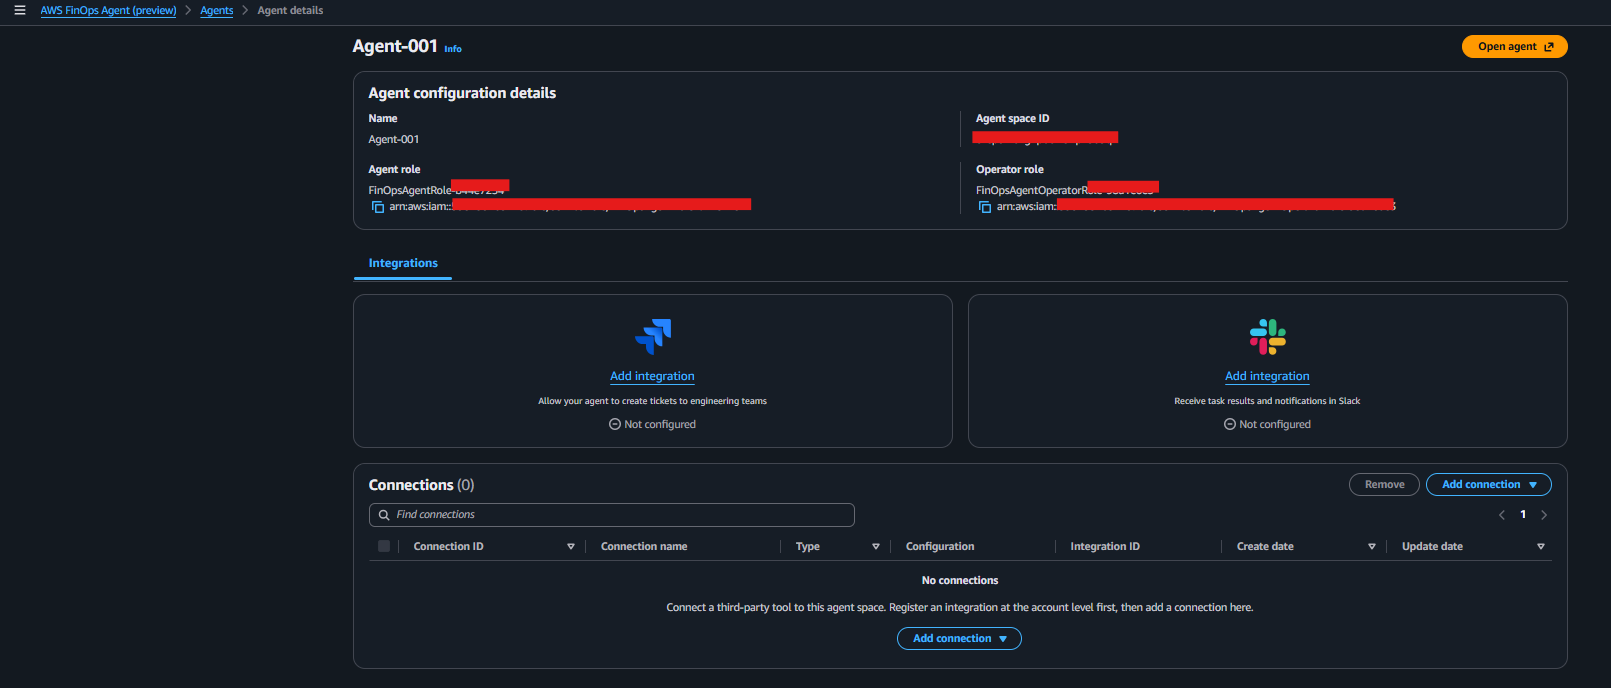
Once created, the agent shows up on the Agents page. Open its detail page and confirm:
Both IAM roles (agent + operator) are listed under Permissions
Any Jira/Slack connections appear under Integrations
📸 Agent detail page
Step 8: Run your first query
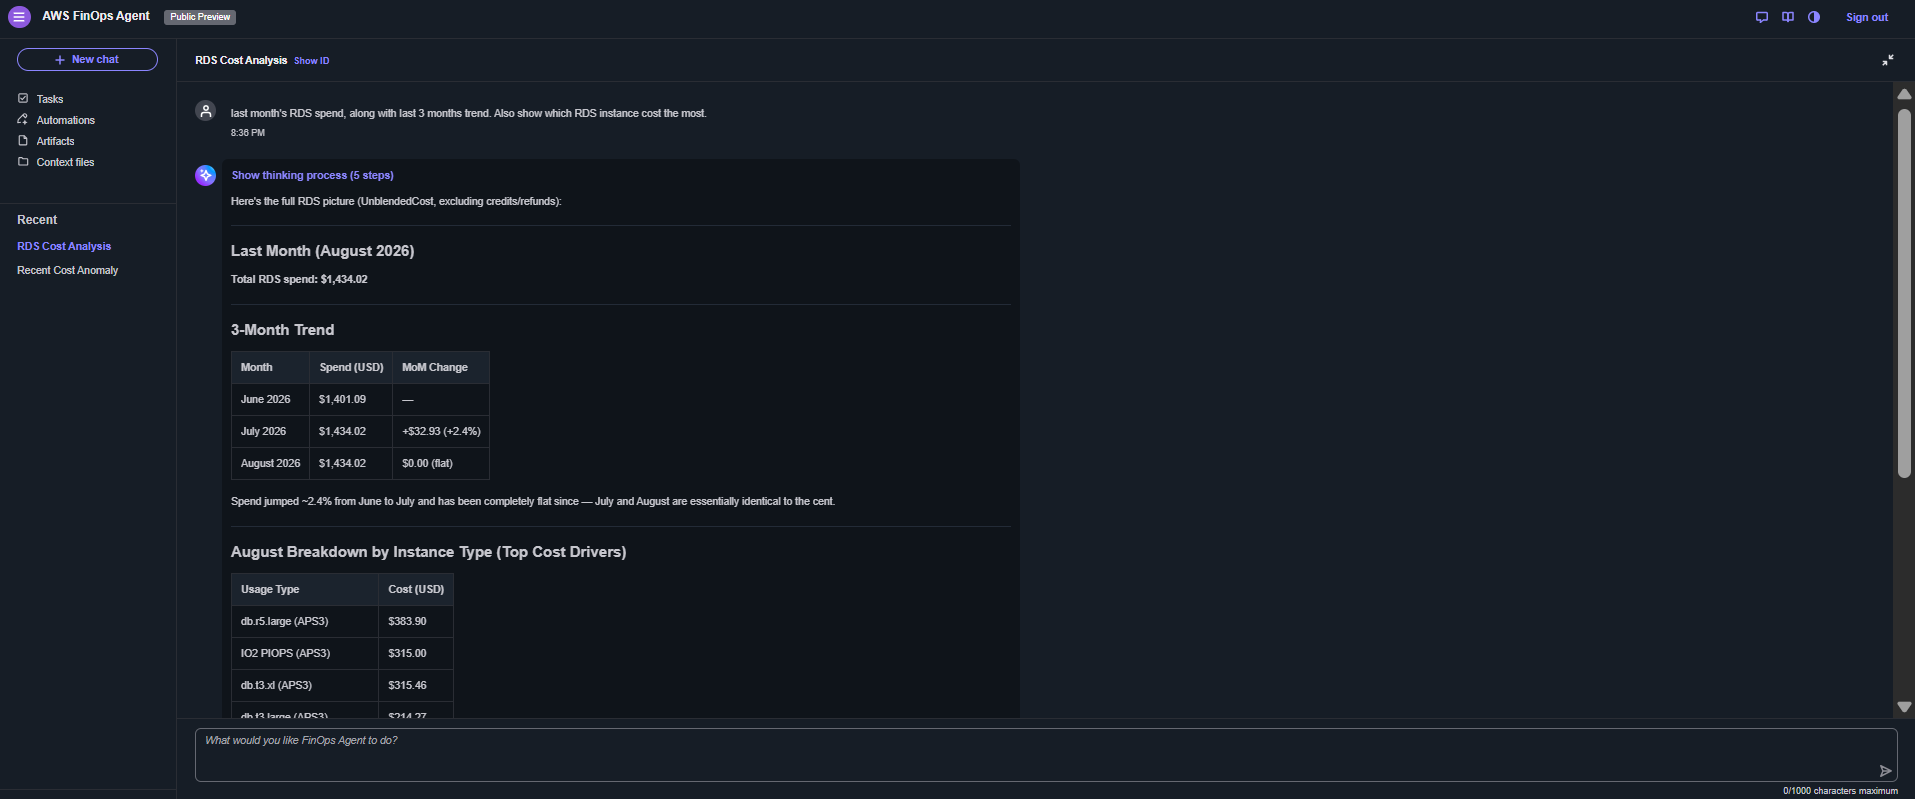
Click on Open agent on the top right and try a natural-language cost question, or just wait for the next Cost Anomaly Detection alert to fire — the agent picks it up automatically and investigates without anyone opening a ticket first.
Wrap-up
That's the full setup, start to finish. It's still a preview product, so expect some rough edges, but the wizard itself is fast the whole thing takes maybe 10 minutes once Cost Optimization Hub and Compute Optimizer are already on.
If you manage cost across multiple AWS accounts, this is worth trying now while it's free, happy to hear how it goes for others.
Sources:


